
Android Email Setup
The Android setup process will go either of two ways depending which network you are connected to and what DNS resources you have access too.
Route 1
Android will make proper use of auto discover and will work out of the box. You’ll know this happened if it only requires you to put in your email address and password.
Route 2
You will need to follow all the steps listed below and manually configure the email server. Depending on your phone your device may not be capable of auto-setup.
If you find you are having difficulty with the setup please feel free to call us for more information, or to set up an appointment for us to configure your device.
Step 1
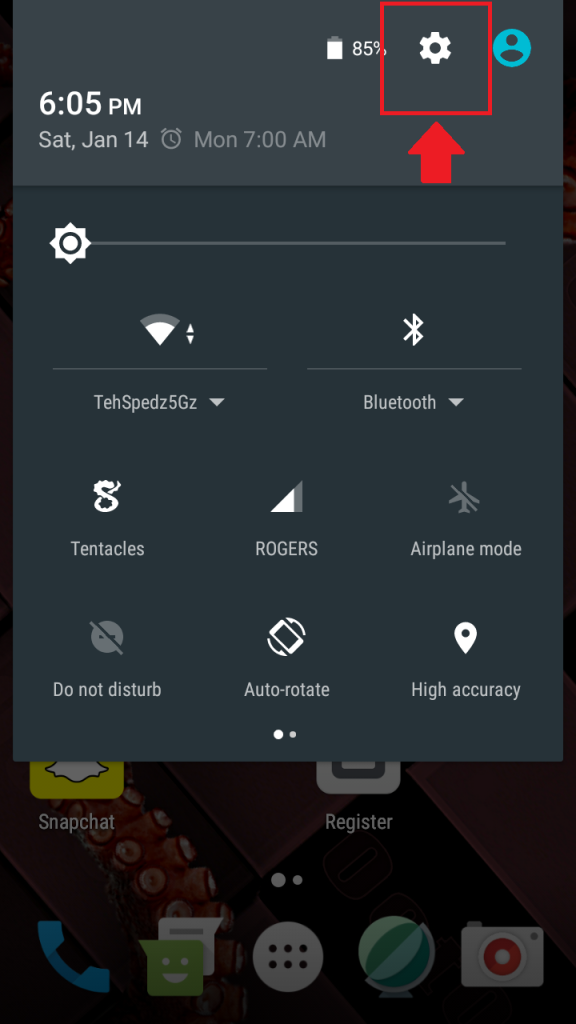
Begin by pulling down the menu from the top of your screen and choosing the gear at the top right. Open your Settings menu.
Step 2
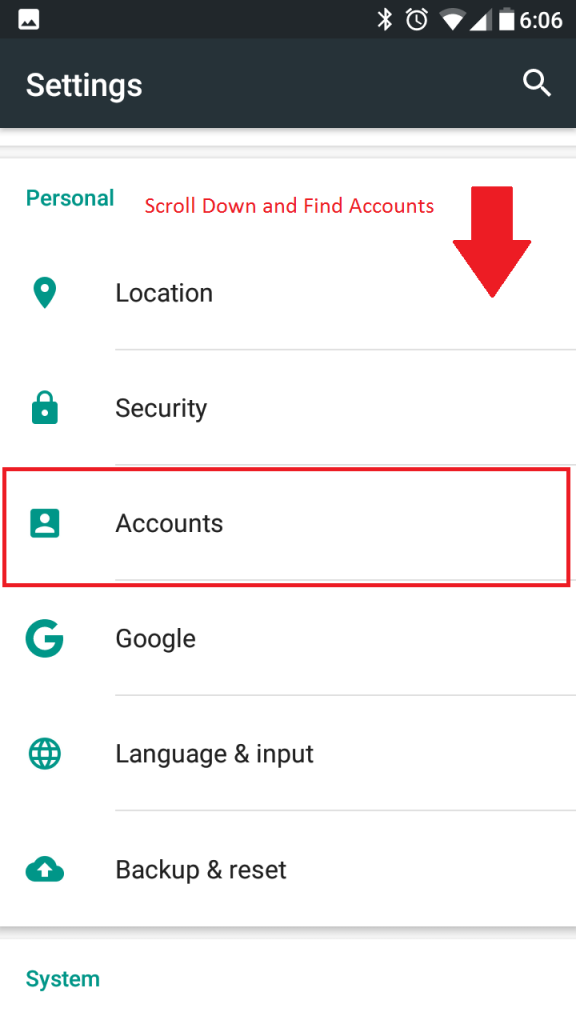
Once you’re in the Settings menu look for Accounts. Under Android Marshmallow operating system it’s under Personal. Your version may vary.
Step 3
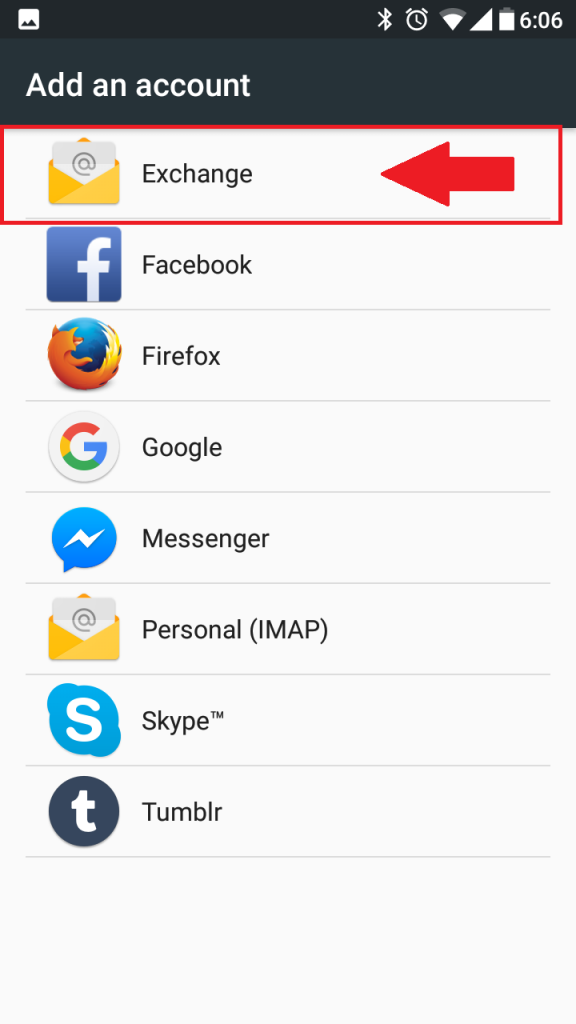
In the Accounts menu you will want to choose Add an Account, and then choose Exchange.
Step 4
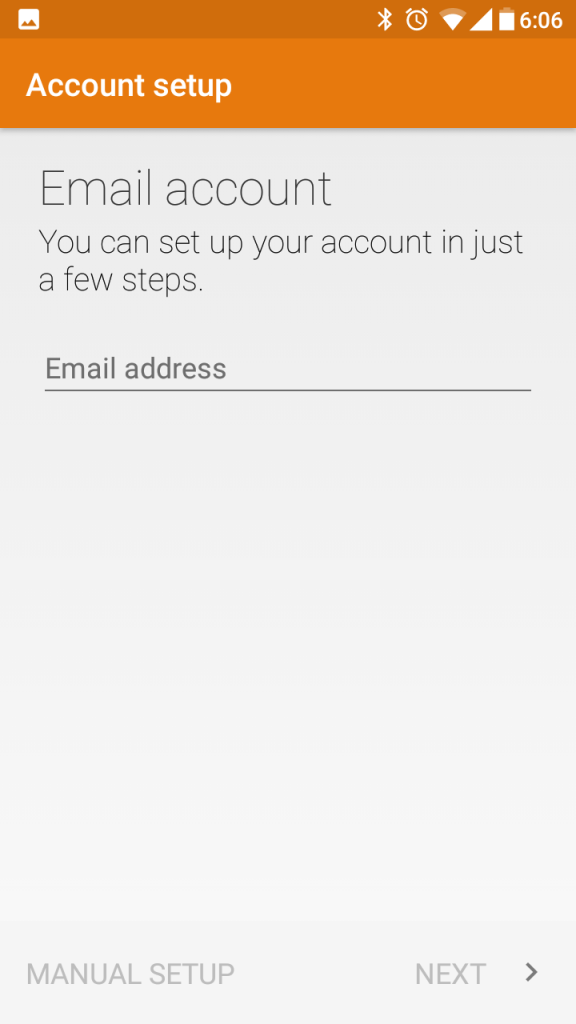
Then you may be prompted to insert your email address and you will have the option to choose next. By hitting next you will be prompted for your password or you can choose Manual Setup. If you choose manual setup skip to Step 7 . Step 6 will be the last step IF Auto-discover is interpreted properly by Android.
Step 5

Please select Exchange.
Step 6
Enter your email password that was provided to you. You have the option of changing this password by logging into webmail. Your phone once connected should never prompt you again for a password even if you change your password as you are using Token Authentication that is generated on a successful login.
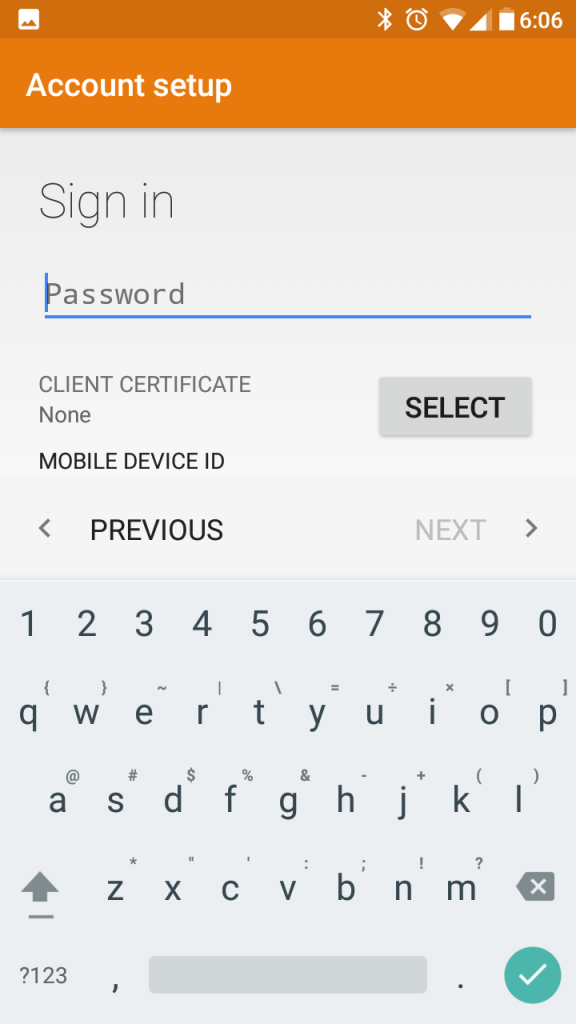
Step 7
Confirm that your full email address (e.g. [email protected]) is under Username and that your password is entered correctly in the Password field.
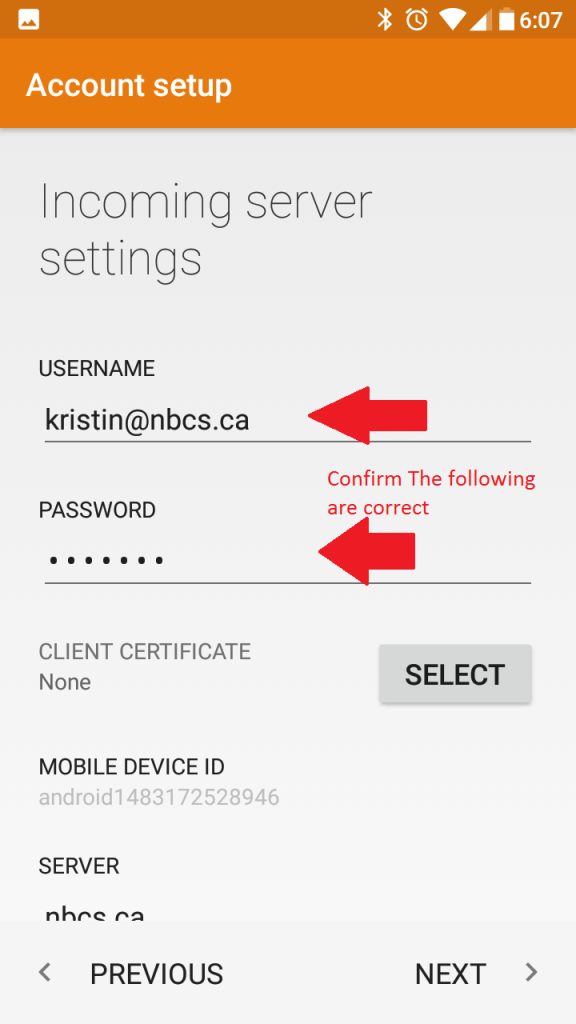
Alternate Settings
Alternatively, your setup may look more like the above image. If your settings are similar those above than in the domain\username is your email address again but like this \[email protected].
Step 8
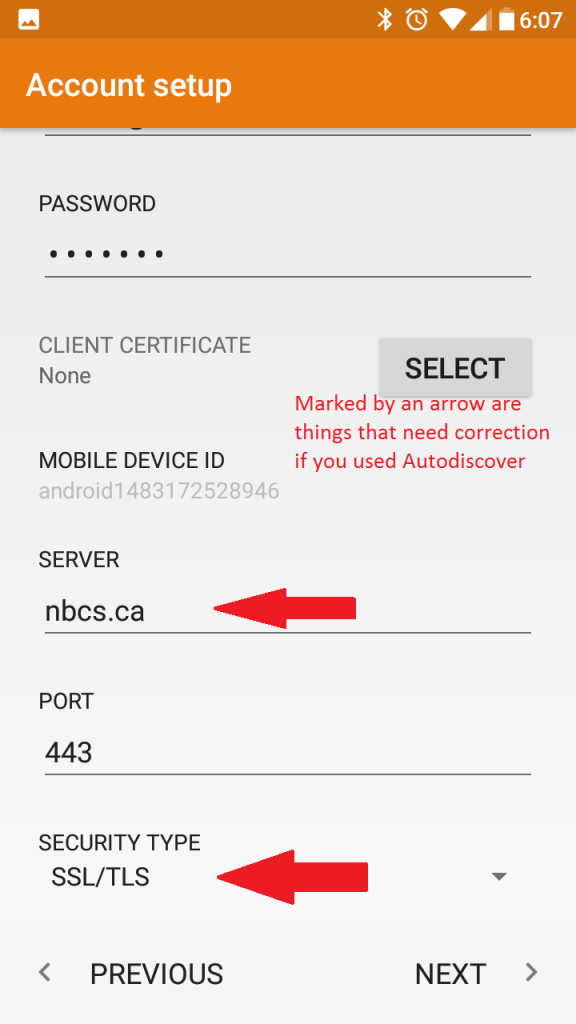
If you used Auto-Discover the following entries will likely be incorrect and will need correcting.
Change Credentials
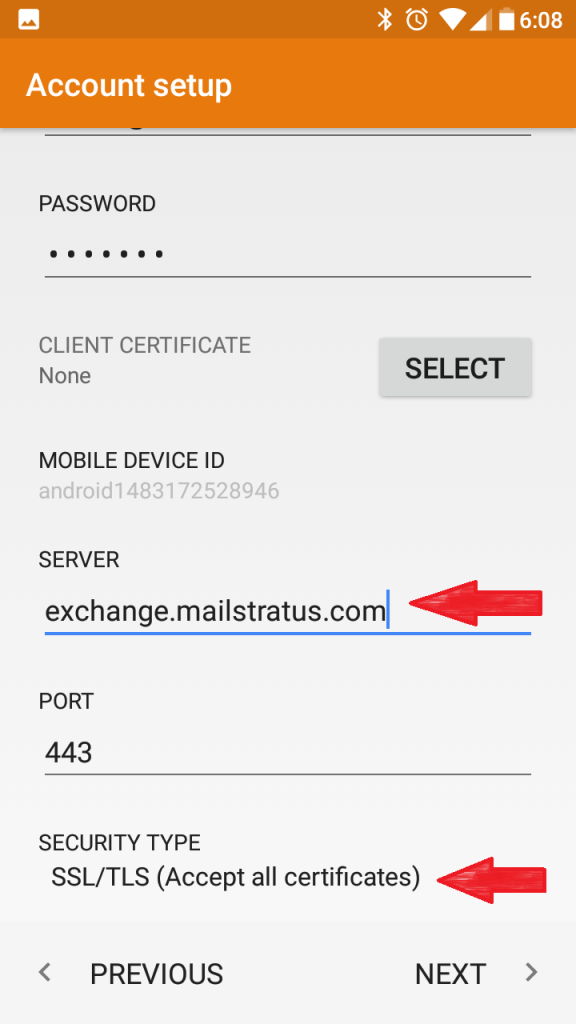
Change Server to exchange.mailstratus.com and ensure Port is set to 443. Change Security Type to SSL/TLS (Accept all Certificates).
Step 9
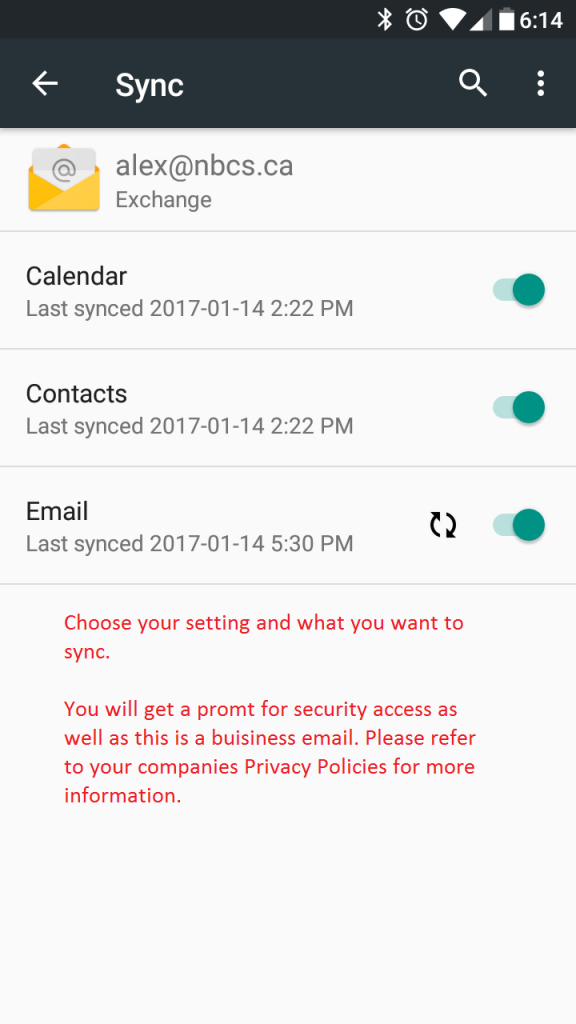
After reading the permissions requested you can finalize your settings by accepting the security prompt. Make sure that you enable all sync options if you wish to have those options activated keeping in mind data charges if you are using your emails on cellular data. SMS sync will duplicate your text messages to your email so you can view them with your emails. You may wish to enable SMS Sync, but it may be less confusing to keep your emails and texts separate.